Gray Blending on Dark Hair: Herringbone Highlights, Lowlights & Soft Transition
The short answer: Gray blending for dark hair keeps some of your natural silver visible while a colorist places fine lighter and darker pieces around it. Herringbone highlights and babylights can interrupt the hard edge where white roots meet an old solid brunette dye; lowlights keep the result from becoming one pale color. A demi-permanent gloss may soften tone without the opaque look of repeated full root coverage. The aim is a gentler grow-out, not a promise that your gray disappears or that one appointment will undo years of dark color.
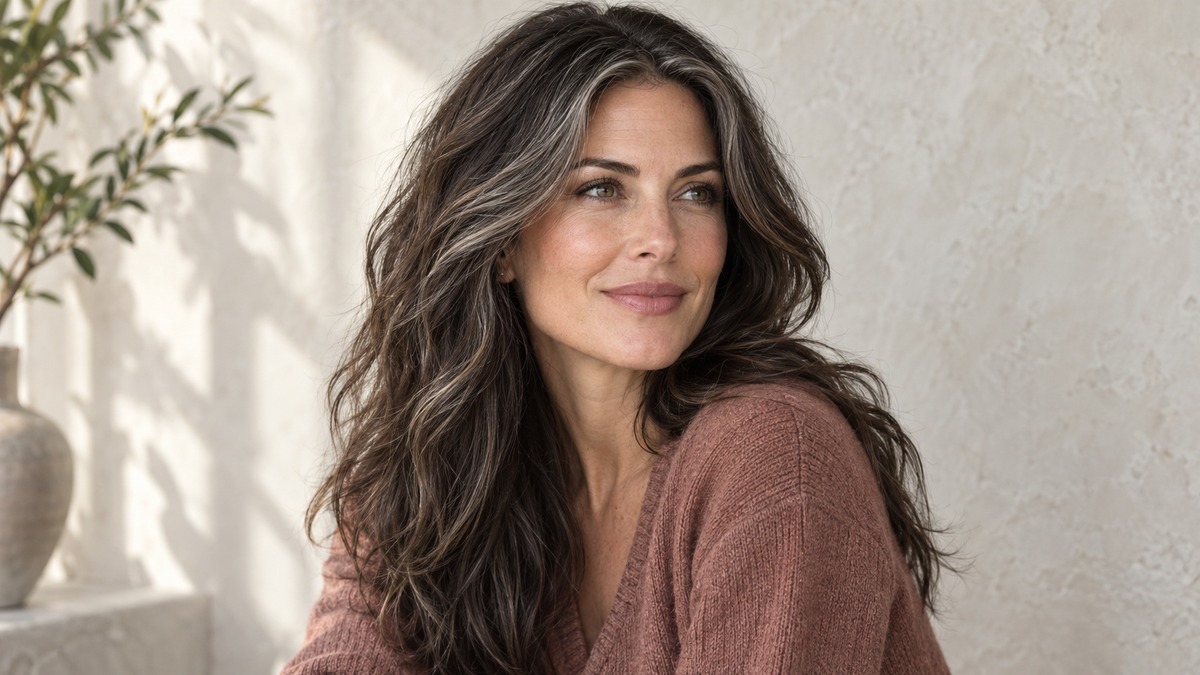
If you color dark roots every two or three weeks, blending offers a different pattern that accommodates new silver. Some people stretch major highlight appointments to roughly every three or four months, with optional toner visits between. Your gray distribution, old dye, desired coverage, and tolerance for roots determine the schedule. Wella’s guide to transitioning to gray describes highlights, lowlights, and root shadows as options tailored to the starting base.
On a narrow screen, scroll sideways to compare every column.
| Decision | Full root coverage | Gray blending |
|---|---|---|
| Visual goal | A mostly uniform dark color with little visible silver immediately after coloring. | Visible dimension: natural silver, selected light pieces, and retained brunette depth. |
| Grow-out | White new growth can make a clear light-to-dark line. | New silver may join an existing varied pattern, making the edge less abrupt. |
| First appointment | Often a root color service if the lengths already match. | May involve a consultation, selective lightening, lowlights, and toning; old dye can require stages. |
| Upkeep choice | Retouch when your visible root line bothers you. | Refresh tone or placement when contrast, fading, or your preferred silver balance changes. |
Choose full coverage if you want an even brunette and accept regular root retouches. Choose blending if you want some silver and a varied finish. Bring photos of both the root pattern and overall depth you want so a silver close-up is not mistaken for a request to lighten every strand.
The Struggle of Dark Hair and White Roots (The Skunk Stripe Dilemma)
A white strand contains little or no pigment, while dark brunette hair contains much more. The difference in lightness makes even a small cluster of new white hairs easy to see along a part or hairline. The amount of gray is less useful than where it grows: a narrow white patch at the front can attract more attention than scattered silver throughout the back. The American Academy of Dermatology explains why gray hair loses pigment; Wella notes the stronger visual contrast on dark bases.
The demarcation line is the boundary between new natural growth and previously colored lengths. On someone who repeatedly applies an opaque espresso shade at the roots, that boundary can look like a white band beside a nearly solid dark block. The faster it becomes noticeable to you, the more often you may feel compelled to retouch. The line says nothing negative about your hair; it is a predictable result of high contrast and uniform color placement.
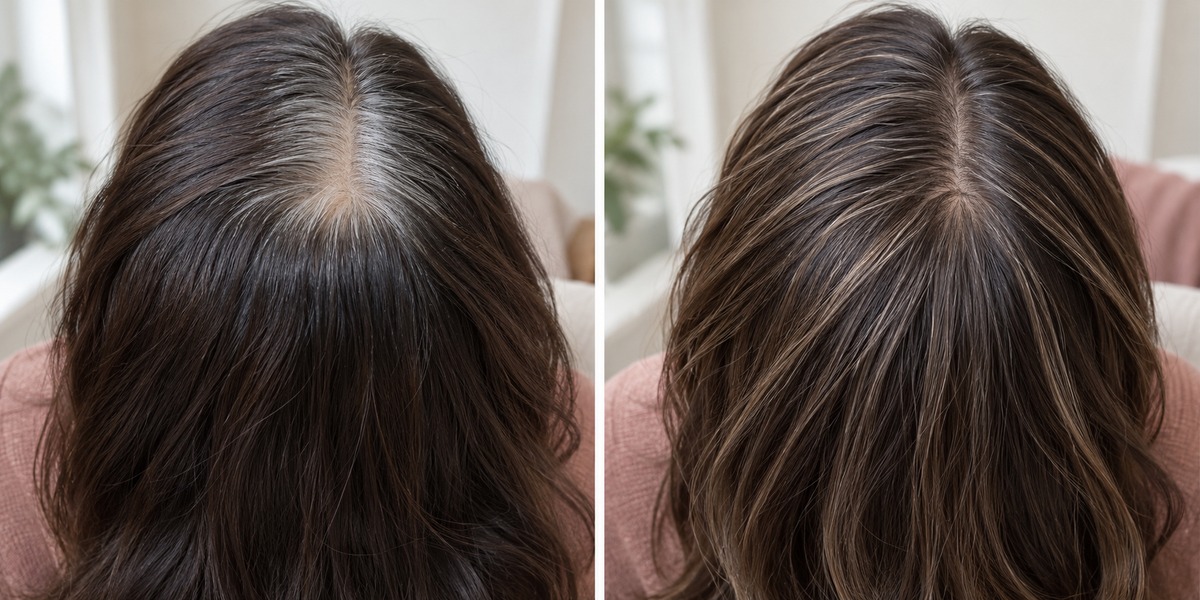
Gray blending changes the pattern around that line rather than changing how your hair grows. A colorist can place lighter strands through the old dark area, leave some natural gray untouched, and add darker strands where too much pale hair would flatten the shape. Roots will remain visible, and underlying permanent dye must grow out or be adjusted over time.
Before choosing a service, check your dry hair in indirect daylight: part, temples, hairline, crown, and back. Is your natural base level 3 espresso, level 4 dark brown, or closer to level 5? Level numbers describe depth, not warmth; see our hair color levels guide. Note whether the lengths are natural, highlighted, or repeatedly dyed. That history shapes the lightening plan.
The Top 3 Modern Gray Blending Techniques for Brunettes
Highlights add light where dark hair meets silver. Lowlights retain depth. A demi-permanent glaze changes tone or softly tints some grays. A colorist may combine them across visits after assessing color history and condition.
1. Herringbone Highlights: Work With the Silver Pattern
Herringbone highlights use fine sections placed diagonally and in alternating directions, rather than a row of identical light stripes. The aim is to echo the irregular path of your own silver strands through a dark base. On a brunette, the added pieces might range from cool mocha or beige to a few brighter silver-adjacent ribbons, depending on what the hair can safely reach. Wella’s professional explanation describes the overlapping diagonal placement and the option to leave pieces out or shade them as lowlights.
The name describes placement, not a shade. A “herringbone” photo may be blonde, brown, warm, or cool. Show your colorist the distribution you prefer: perhaps more lightness at the part and temples, with espresso through the back. Ask which silver clusters to incorporate and which dark areas to keep.
If your mid-lengths have layers of permanent dark dye, the colorist may need a test strand or staged lightening before those pieces can resemble cool silver. Exposed warmth can show during lifting; a toner can adjust the reflection only after the strand reaches a suitable depth. The AAD cautions that lifting hair more than three shades generally requires stronger peroxide and can increase damage. Ask how many visits the target is likely to require and what a safer, darker first stage would look like.
2. Lowlighting & Babylights: Keep Depth Around the Face
Babylights are very fine lightened sections. Around a dark hairline, they can interrupt a concentrated patch of white roots without replacing the entire brunette base. The placement matters: a few pieces where your silver actually appears can be more useful than bright highlights hidden under the back layers. Wella’s brunette gray guidance recommends strategically placed highlights around the hairline for this kind of dimensional blend.
Lowlights add darker color to selected lighter or gray sections. They can keep the hair from reading as one wide sheet of silver or beige, especially when your natural grays are concentrated at the front. The dark pieces should usually connect visually to your existing brunette depth. If every white strand is darkened, you are moving back toward coverage and its sharper grow-out; decide together how much silver you want to keep. Wella’s transition guide discusses lowlights alongside highlights and soft root shading.
Try: “Keep dark brown through the lower layers, add fine brightness along my part, and leave silver at my temples.” Specify neutral, cool, or softly warm pieces. Icy references may require more lift than beige-mocha over old dye. Silver does not require you to become blonde.
3. Demi-Permanent Translucent Glazes: Soften Tone Without a Solid Cap
A demi-permanent color uses developer and deposits or shifts visible tone with less commitment to an opaque root-to-tip result than a traditional permanent coverage service. Many salon lines offer sheer or translucent options that allow some silver to remain visible. “Demi” does not automatically mean ammonia-free, zero lift, or zero damage: properties depend on the specific product and developer. Ask your colorist which formula they mean and whether it is intended for soft blending, partial coverage, or glossing lightened strands. Wella distinguishes its demi Color Touch blending service from its permanent full-coverage option.
A glaze can help cool excessive warmth in newly lightened ribbons or make bright white strands look softer against dark brown. It cannot remove an old solid band of permanent dye, make unlightened dark hair silver, or permanently stop the roots from appearing. It also fades: how quickly depends on formula, washing, porosity, and exposure. Discuss what the color will look like after the gloss has worn down, not just under salon lights on day one.
To stop permanent root coverage, ask for a transition plan rather than a demi formula over the same solid area. A dense dark application can still look uniform. Follow the chosen product’s instructions and your colorist’s advice about allergy screening and processing.
The Transition Roadmap: Step-by-Step Salon Strategy
A soft transition is usually a sequence, especially when years of dark permanent dye cover the mid-lengths and ends. Your first consultation should establish the finish you want and what the current hair can handle.
Phase 1: Reveal Enough Natural Root to Map the Gray
If you can tolerate it, let roughly 3–4 cm of natural root show before the planning visit. That gives the colorist a clearer view of your actual dark base and where silver grows along the part, hairline, and crown. It is a planning target from the brief, not a requirement for every person. If you have an event or dislike visible roots, book a consultation sooner and ask how to plan around a shorter sample.
Bring your recent salon and home dye history, including dark shades over highlights. Show two unfiltered references: one for silver-to-brown balance, one for overall depth. Say whether you accept a visible transition or want temporary root coverage.
Phase 2: Break Up the Old Dark Boundary
The colorist can place fine highlights through selected dark lengths near the gray pattern, add lowlights where needed, and soften the root area. Which pieces are lightened, how far, and in how many sessions depends on old pigment and hair integrity. Wella notes that darker hair may need several visits for a full gray transition. A darker, dimensional first stage can still be a useful win if it weakens the solid line without forcing the ends toward pale silver immediately.
Ask to see a strand test when the history is uncertain. Clarify whether any color remover or pre-lightening is proposed, what warmth might be visible between stages, and where the brightest sections will sit. If the first session cannot safely produce the reference, request a photograph or swatch of a realistic interim target. Stopping at a healthy mocha-and-silver blend is a valid destination, not a failed version of an all-silver photo.
Phase 3: Shift to Tone and Placement Maintenance
Once the old boundary is less obvious, future appointments can focus on the pieces that need refreshing rather than automatically painting every root. Some visits may be a gloss or toner; others may add a few fine highlights or lowlights around a changed gray pattern. L’Oréal Professionnel’s gray blending guidance describes dimension as a way to soften a line of demarcation, while the precise plan remains individual.
At home, follow care for your colored hair, limit unnecessary heat, and protect it from heavy sun. If a purple or blue product is suggested, ask which strands it should tone. Purple addresses yellow-looking pieces; blue addresses orange-looking brunette pieces. Neither lifts dark hair. Follow the product directions. Our hair color wheel guide explains the tone pairs.
Salon Cost and Upkeep Calendar
The budget question is not simply “Which service costs less?” A full-coverage root appointment may cost less per visit than a complex first blending appointment. Blending can mean fewer major placement visits later, but it may also involve toner appointments, more time in the chair, and a substantial initial correction. Prices vary by salon, market, hair length, product use, and the work needed to lift old dye. Ask for a written estimate before starting, including any strand test, color correction, gloss, and future maintenance.
Here is a planning calendar, not a guaranteed schedule. If you currently retouch every three weeks, that is about 17 visits across 52 weeks. A 12- to 16-week interval between larger blending services works out to roughly three or four such visits per year, with any additional gloss visits counted separately. You may want to come in sooner if the hairline becomes too bright, the toner fades, or the placement no longer suits you. Equally, a subtle, deeper blend may need less attention than an icy silver goal.
On a narrow screen, scroll sideways to compare every column.
| When | What to check | Possible salon conversation |
|---|---|---|
| Consultation / first visit | Natural gray map, old dye, strand condition, target depth | “What can we safely blend today, and what needs another stage?” |
| Several weeks after | Toner fade, exposed warmth, hairline contrast | “Does this need a gloss, a small placement adjustment, or no service yet?” |
| Around 12–16 weeks, if appropriate | Whether silver and light ribbons still connect | “Would a few babylights or lowlights help, or can we wait?” |
| Before each next visit | Total annual time and cost, not just one appointment | “Which steps are optional for the amount of gray I want visible?” |
To compare quotes, write down the first transition total, the expected price and duration of a major refresh, any optional gloss visits, and how many visits you would choose in a year. If the blend is only comfortable when you pay for frequent toning, it may not meet your maintenance goal. If keeping more natural silver lets you skip some services, that benefit may matter more than the first appointment’s price.
What to ask for at the consultation
- “Can we keep my overall hair clearly dark while softening the white root line?”
- “Which of my silver areas should stay untouched, and where would fine highlights help?”
- “Will you use herringbone placement, babylights, lowlights, a gloss, or a combination—and why?”
- “What old color must be removed or lightened, and what is a realistic first-session shade?”
- “How will this look at six weeks, when a toner fades, and after three or four months?”
- “What would make the plan costlier or require another visit?”
FAQ: Gray Blending on Dark Hair
Can I blend gray without becoming blonde?
Yes. You can keep dark brown as the dominant color and add only a small number of fine, lighter pieces near your silver. The goal may be cool mocha, soft beige-brown, or mixed salt-and-pepper depth rather than pale blonde. The colorist should show how the result reads from a normal viewing distance, not only in a close-up of one foil.
Will herringbone highlights cover every gray hair?
No. They weave color around natural gray so it becomes part of a varied pattern. If your priority is to hide nearly all white strands immediately, full coverage or a higher-coverage service may fit better. Tell the colorist which areas you want to see silver in and which you would prefer to tint.
Is demi-permanent color enough to erase a dark dye line?
Usually not by itself. A demi gloss can adjust tone and sometimes soften contrast, but it does not lift the old opaque dark lengths to a lighter shade. Selective lightening, lowlights, or time growing out the old dye may be needed. Ask for a plan based on the actual dye history, not a product category alone.
How often will I need to visit the salon?
There is no universal interval. A low-contrast blend may let you leave more time between larger services than a solid dark root retouch, while a cool, bright target may need more frequent toning. Use the first few months to observe your own root line and fading, then adjust the calendar with your colorist. If you enjoy full coverage, regular root visits remain a reasonable choice.
If you are weighing a deep brunette blend against a brighter silver direction, the hair color quiz can help organize your shade preferences. For your salon visit now, save two daylight references, note your recent color history, and use the consultation questions above to choose a first stage you can maintain.